

A Cute Little Guide to Using a Digital Projector for Creative Photoshoots
In this cute little guide, I will provide you with a step-by-step walkthrough on integrating a digital projector into your creative arsenal.
In the ever-changing world of modern photography, your creativity knows no bounds! But venturing into new creative realms can be pretty spooky. The game-changer? The humble digital projector. This little machine can elevate your craft and have you creating extraordinary, cinematic experiences that tell powerful stories. Or at the very least, look very cool and interesting.
But how do you infuse the magic of projectors into your photo work without disappearing down a rabbit hole of technical complications? In this cute little guide, I will provide you with a step-by-step walkthrough on integrating a digital projector into your creative arsenal.

Step 1: Acquaint Yourself with Your Digital Projector
Before the grand orchestration of a photoshoot can begin, you need to become one with your digital projector. Unbox it, examine it, and most importantly, understand its settings and capabilities.
Understand the Lumen Output
Lumens are to projectors what horsepower is to a car. This is the measure of brightness, and for a photoshoot, the brighter the better. The higher the lumen count, the more capable the projector is of competing with ambient light in a well-lit space.
Get to Know the Keystone Correction
The keystone correction feature ensures that the image is square and does not have a trapezoidal shape from the front or back of the projector, a vital aspect when projecting onto non-flat surfaces like walls or clothing.
Step 2: Crafting Your Backgrounds
The beauty of using projectors in photography is the sheer versatility it offers in the creation of backgrounds. You're no longer confined to physical backdrops; instead, you can curate a selection of digital worlds to complement your subject.
Leverage Image Software
By using image software like Photoshop, you can create custom backgrounds that are precisely crafted for your vision, from dreamy landscapes to abstract patterns. Ensure the images are high-resolution and consider the color temperature to match the ambience you wish to convey.
Don't Shy Away from Motion
The dynamic element of motion can elevate your backgrounds and create a sense of narrative in your photographs. Consider simple animations or even video loops for a more engaging visual impact.
Step 3: Setting Up the Projector
With your custom backgrounds ready, it's time to set up the projector. This phase is crucial in ensuring that your projected image is clear, crisp, and perfectly aligned with your creative intent.
Focus and Positioning
Project the images onto a neutral surface, such as a white sheet or wall, to act as your canvas. Adjust the lens focus until the edges of your image are as sharp as the center. Carefully position the projector to avoid any unwanted shadows cast by the photographer or set elements.
Play With Distance
The further you place the projector from the background, the larger the image will be. Be mindful of the room size and how much space you have to work with. A test projection will help gauge the perfect distance for the desired effect.
Step 4: Integrating the Projector into the Photoshoot
Now that your projector is set up, it's time to integrate it into the photoshoot. This integration should be seamless and enhance, not hinder, the workflow.
Adjust Ambient Lighting
Maintain a balance between the light emitted by the projector and any ambient lighting in the room. Too much external light can wash out the projected image, while too little can create unwanted contrast or alter the colors.
Utilize the Live View
Most modern cameras come with a live view feature. Use this to compose your shot directly within the projected image, ensuring that all elements are aligned precisely for the ideal photograph.
Step 5: Illuminating Your Subjects
The projected background is in place, and the scene is set. The final step is to illuminate your subjects within this digital tapestry, and this is where the magic truly comes alive.
Use External Flash for Pop
Employ external flashes to light your subject and to add depth to the image. The flash will illuminate the subject and either fill in or combat the ambient light's influence over your projected background.
Play with Projected Light
The light from the projector isn't just for backgrounds. Use it as a creative tool to project shapes, patterns, and even color over your subject for a unique, otherworldly effect.
Step 6: Capturing the Shot
With the setup complete, the only thing left to do is capture the shot. This is the moment where your skill and artistry combine to produce the final, compelling image.
Experiment and Take Multiple Shots
The first shot is seldom the best. Experiment with poses, lighting angles, and projector settings. Take multiple shots to ensure you have a range of options to choose from, giving yourself creative freedom during the post-process.
Collaborate and Communicate
If you're working with models or a team, clear communication and collaboration are vital. Ensure everyone understands the vision for the shoot to align their efforts with the desired outcome.
A Final Note on Digital Projection Photography
Using a digital projector in your photography may present a learning curve, but it's also an exciting journey. With practice, patience, and these detailed steps at your fingertips, you're well on your way to crafting visual masterpieces that redefine photography.
Success lies in focusing on your creativity rather than getting lost in technicalities. Explore how this tool enhances your unique style. Be bold in your projects, fierce in your captures, and always push the boundaries of your craft. Your lens unveils endless realms; with the projector by your side, you can breathe life into those realms within your frame.
Keep creating dope art!
- Whitney


Mid-Century Modern Set Styling
Check out the raw, stripped-down soul of the mid-century modern vignette and how it's been styled in different ways. One is a glowing high-fashion editorial vibe with artificial lighting, while the other channels a cozy cafe atmosphere bathed in natural light.
Check out the raw, stripped-down soul of the mid-century modern vignette and how it's been styled in different ways. One is a glowing high-fashion editorial vibe with artificial lighting, while the other channels a cozy cafe atmosphere bathed in natural light. Book the space today and create some of your own magic!
Fashion Editorial Shoot
Wardrobe & Styling : Zoe Michele Fashion
Photography : Whitney of Tupelo House
Cafe Merch Content Shoot
Merch Products : Plaid Room Records
Photography : Whitney of Tupelo House


Party of four!
This family right here… They’ve being clients of mine for over ten years and are now come of my closest friends. I photographed Leo and Alli's engagement, their wedding and even the delivery of their first son. Here's so many many more years of collecting memories!
This family right here… They’ve being clients of mine for over ten years and are now come of my closest friends. I photographed Leo and Alli's engagement, their wedding and even the delivery of their first son. Here's so many many more years of collecting memories!


Large Groups Example Photos!
There comes a time when we all need a space to house grandparents, uncles, siblings and kids. Here’ you’ll find some large groups we’ve had around the studio.
There comes a time when we all need a space to house grandparents, uncles, siblings and kids. Below are some large groups we’ve had around the studio. Attached below is my go-to video on how to photoshop the outside border of a paper roll, I’ve used this trick countless times.
Brand New Bright Wall!
She’s new, she’s exciting and because of this I don’t have many sample photos YET. With the amount of chairs, couches, ladders and trees (weird thing to type but cute)

Velvet Curtains
What’s behind the curtains!? Is it a stage? Could it be a balcony overlooking downtown Loveland, Ohio? Nope. Behind these curtains are out entrance doors and our giant selfie mirror.


Ceiling high windows!
Original window from the humble beginnings of our historical building. Pull the curtains to diffuse the light or open then up for that warm glow. Or, place a group of gorgeous hair stylists in front to give them that edgy city girl look. You decide!


Filling in the background of photos
Of all the tutorial videos explaining this process, the one below is what spoke to me the most. Enjoy!


Tupelo House + The Curious Kitchen
Tupelo House product photography with The Curious Kitchen

Tupelo House &
The Curious Kitchen
Today’s house guest came as a product photography collaboration with founder MK Hennigan of The Curious Kitchen. Together we curated minimal but playful product and content images. We’ll allow MK to introduce herself in her own words.
I’m MK Hennigan - Welcome to my kitchen!
As you might guess from the name of this site, I love spending time in the kitchen, and my curiosity drives constant experiment.
Inspired by my deep Southern roots and the women in my family, I turned my passion for all things culinary into In the Curious Kitchen.
This is the place where comfort food takes innovative twists and turns.
Where generations- old recipes are updated into creative small bites, family meals, and delectable desserts.
And this is a place where family’s traditional entertaining ideas evolve into today’s fast paced lifestyle.
- MK Hennigan, Founder of The Curious Kitchen


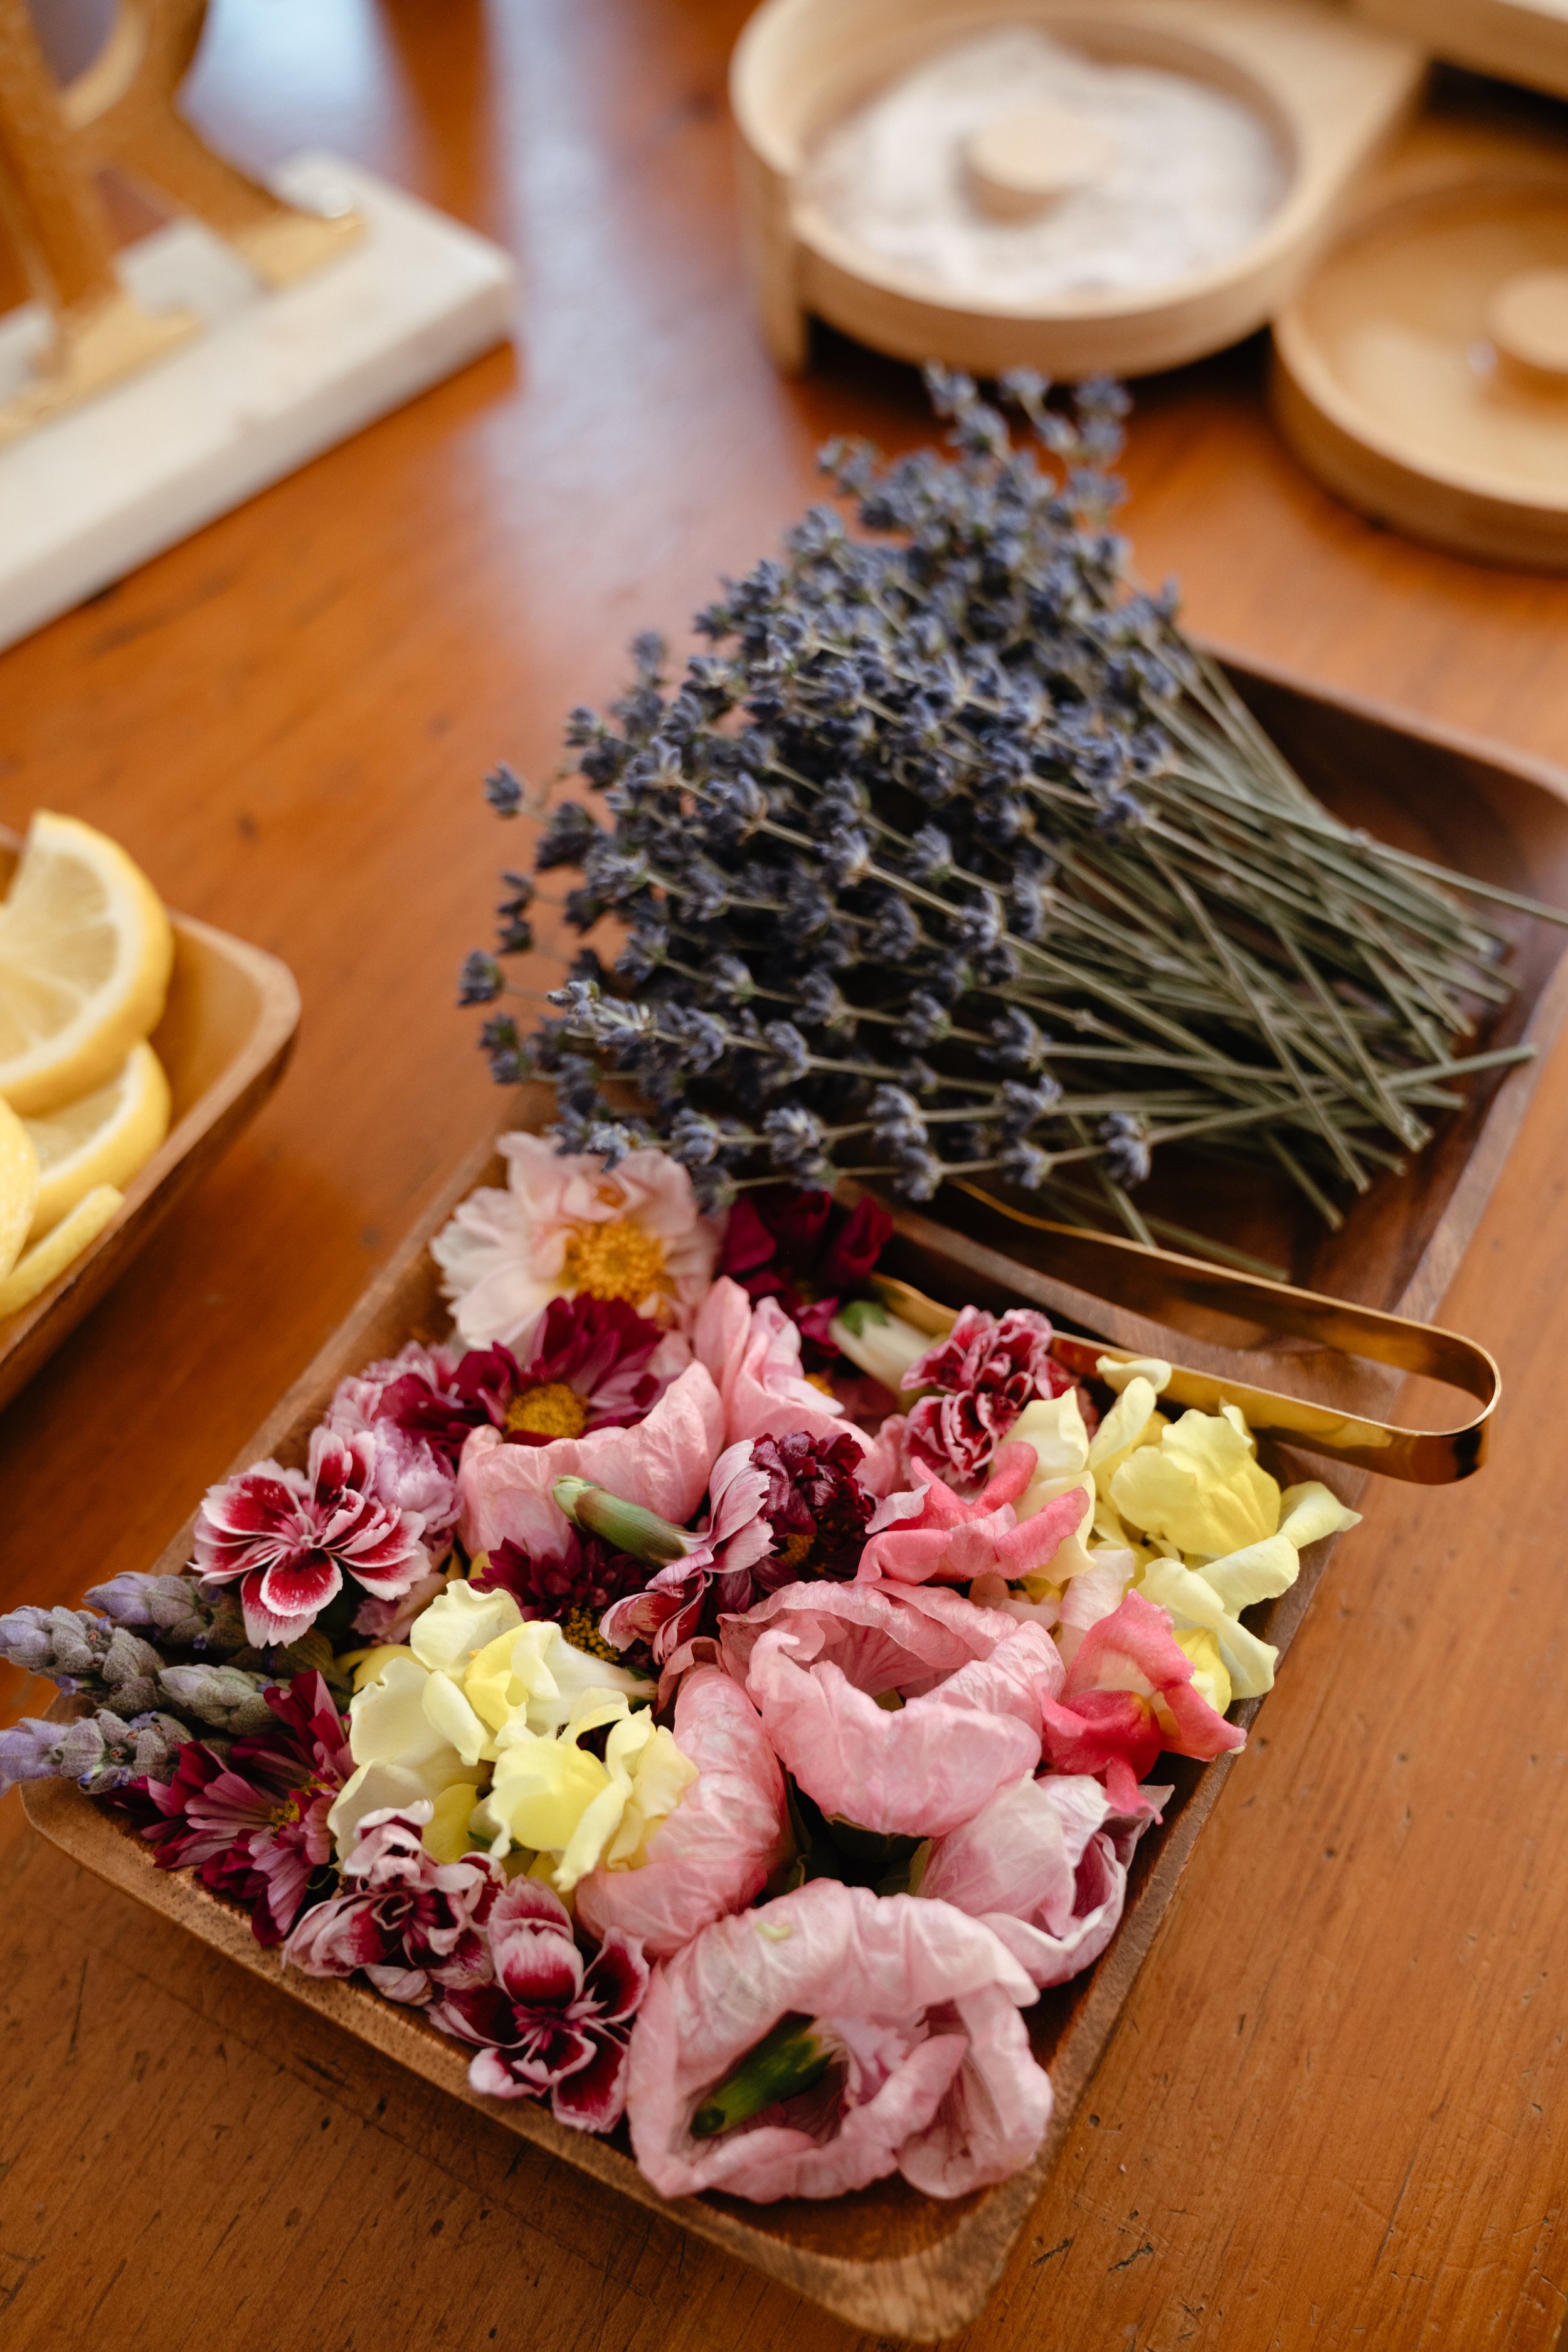
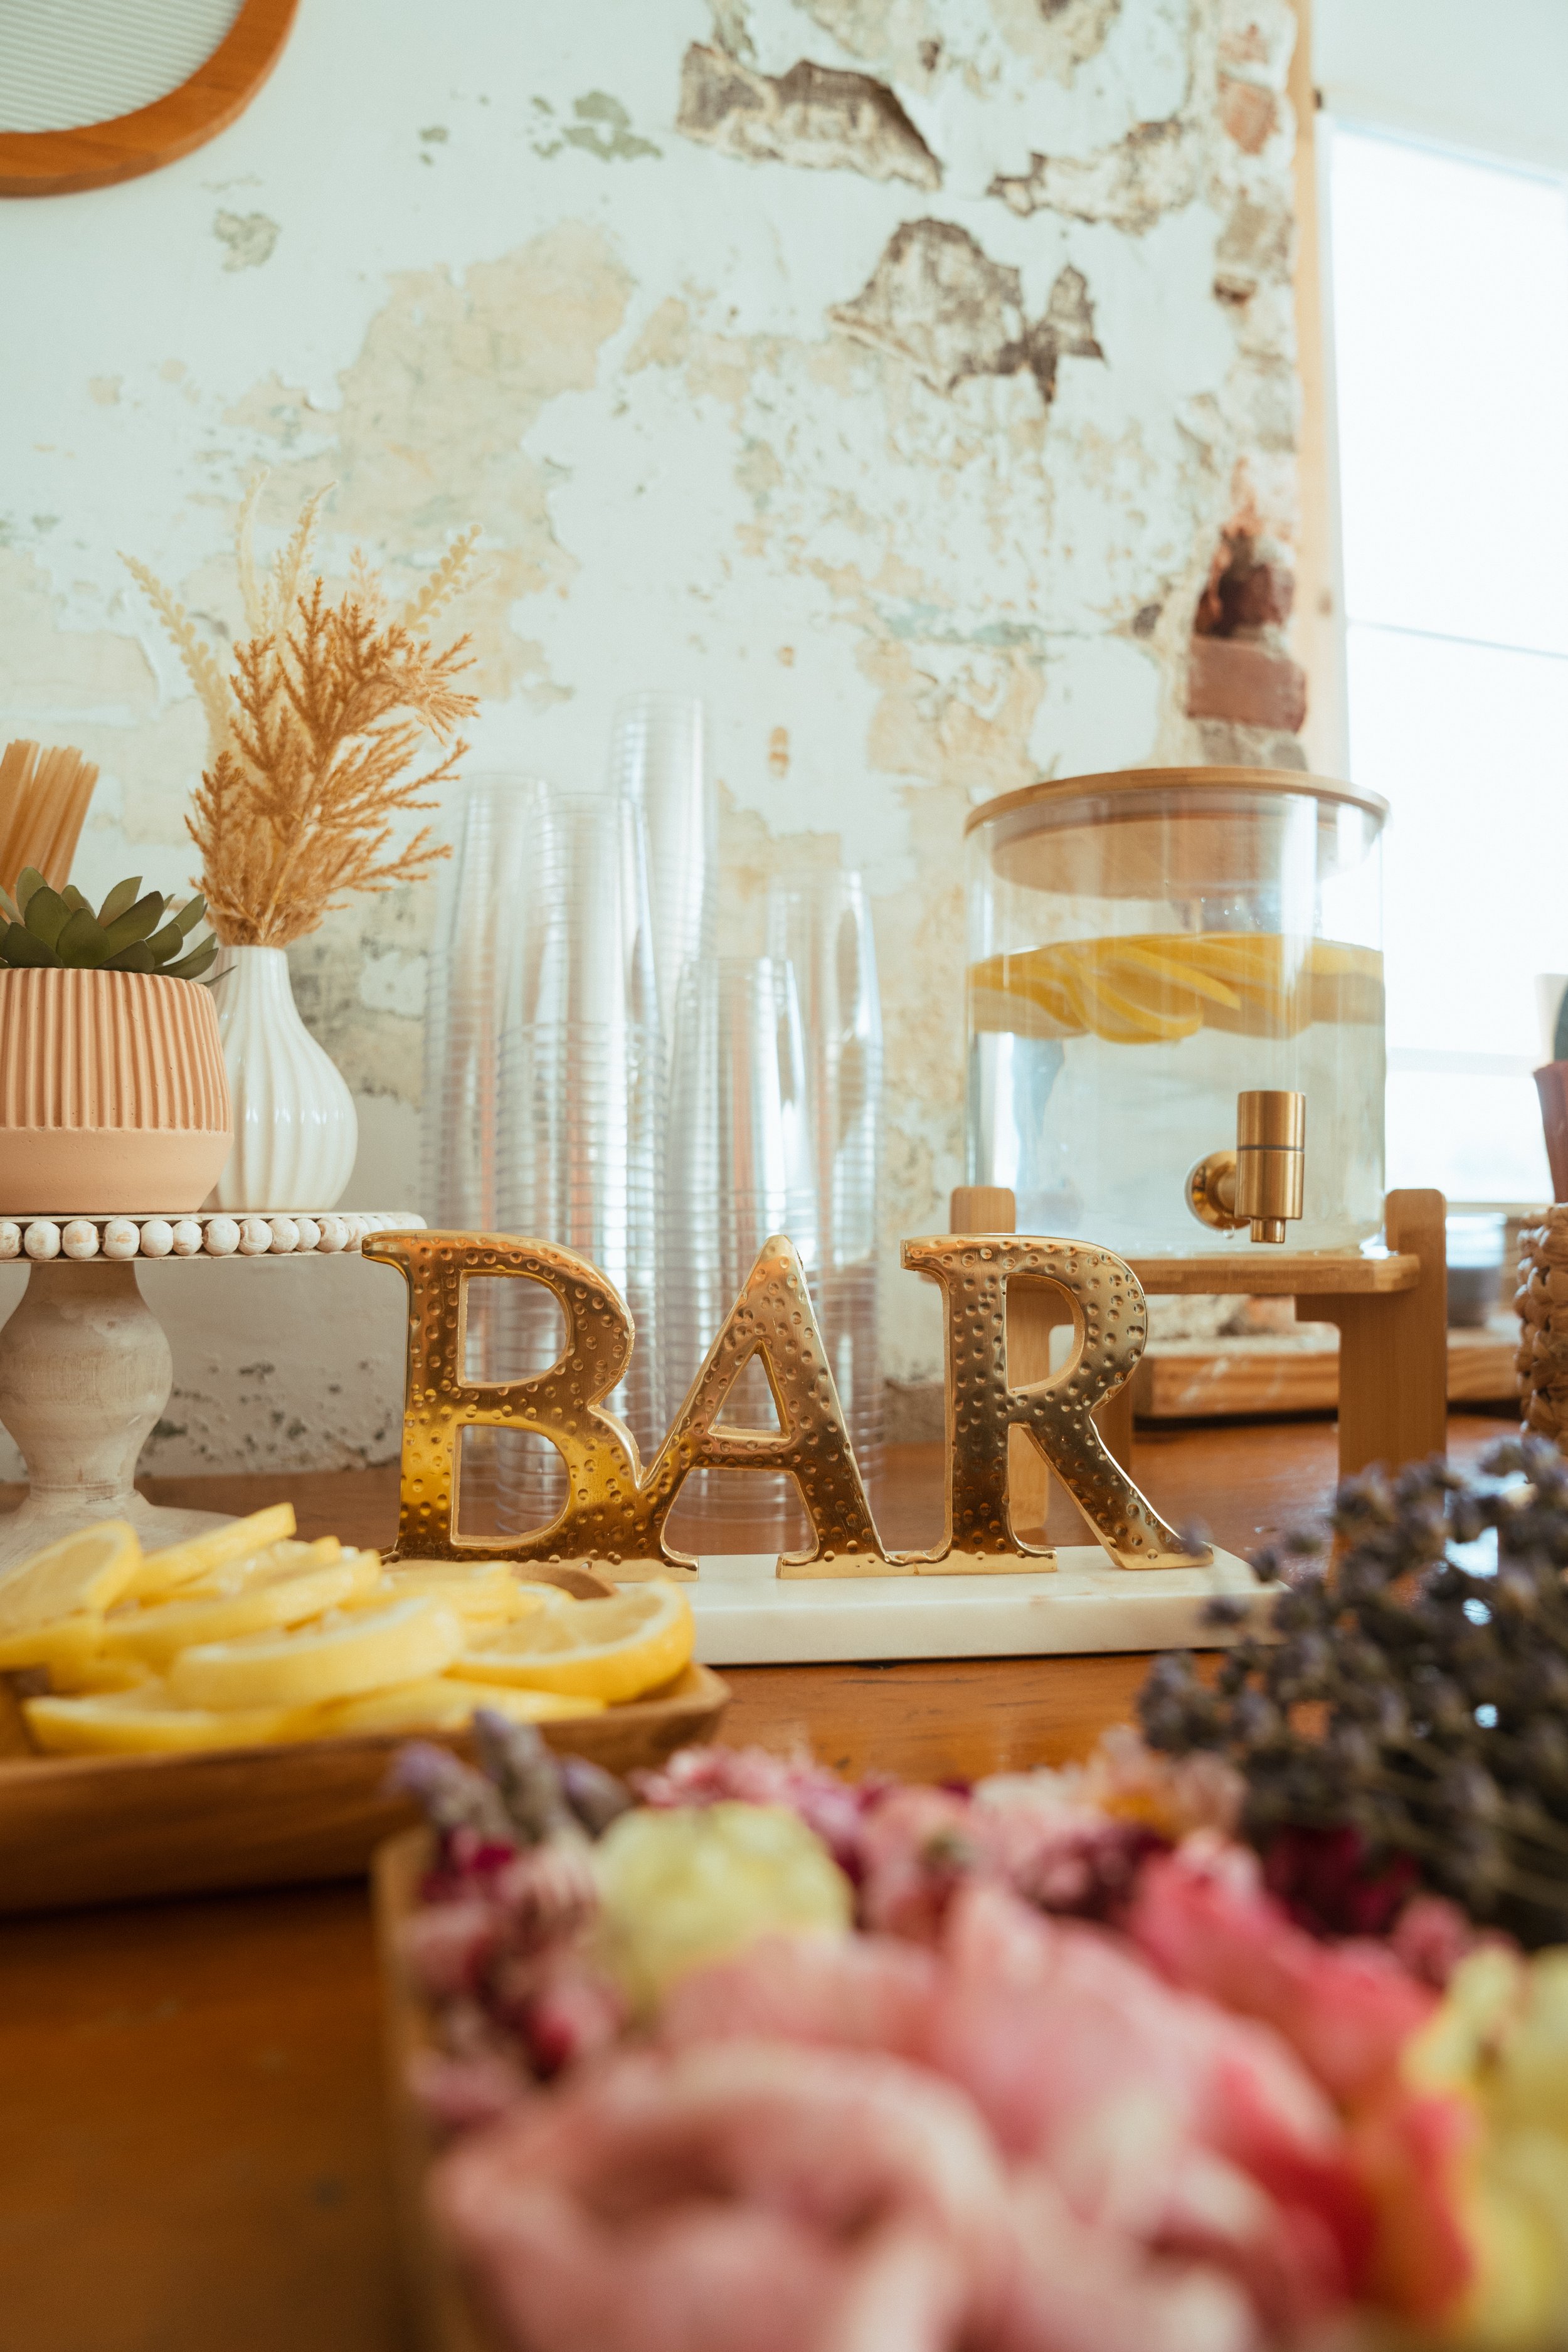
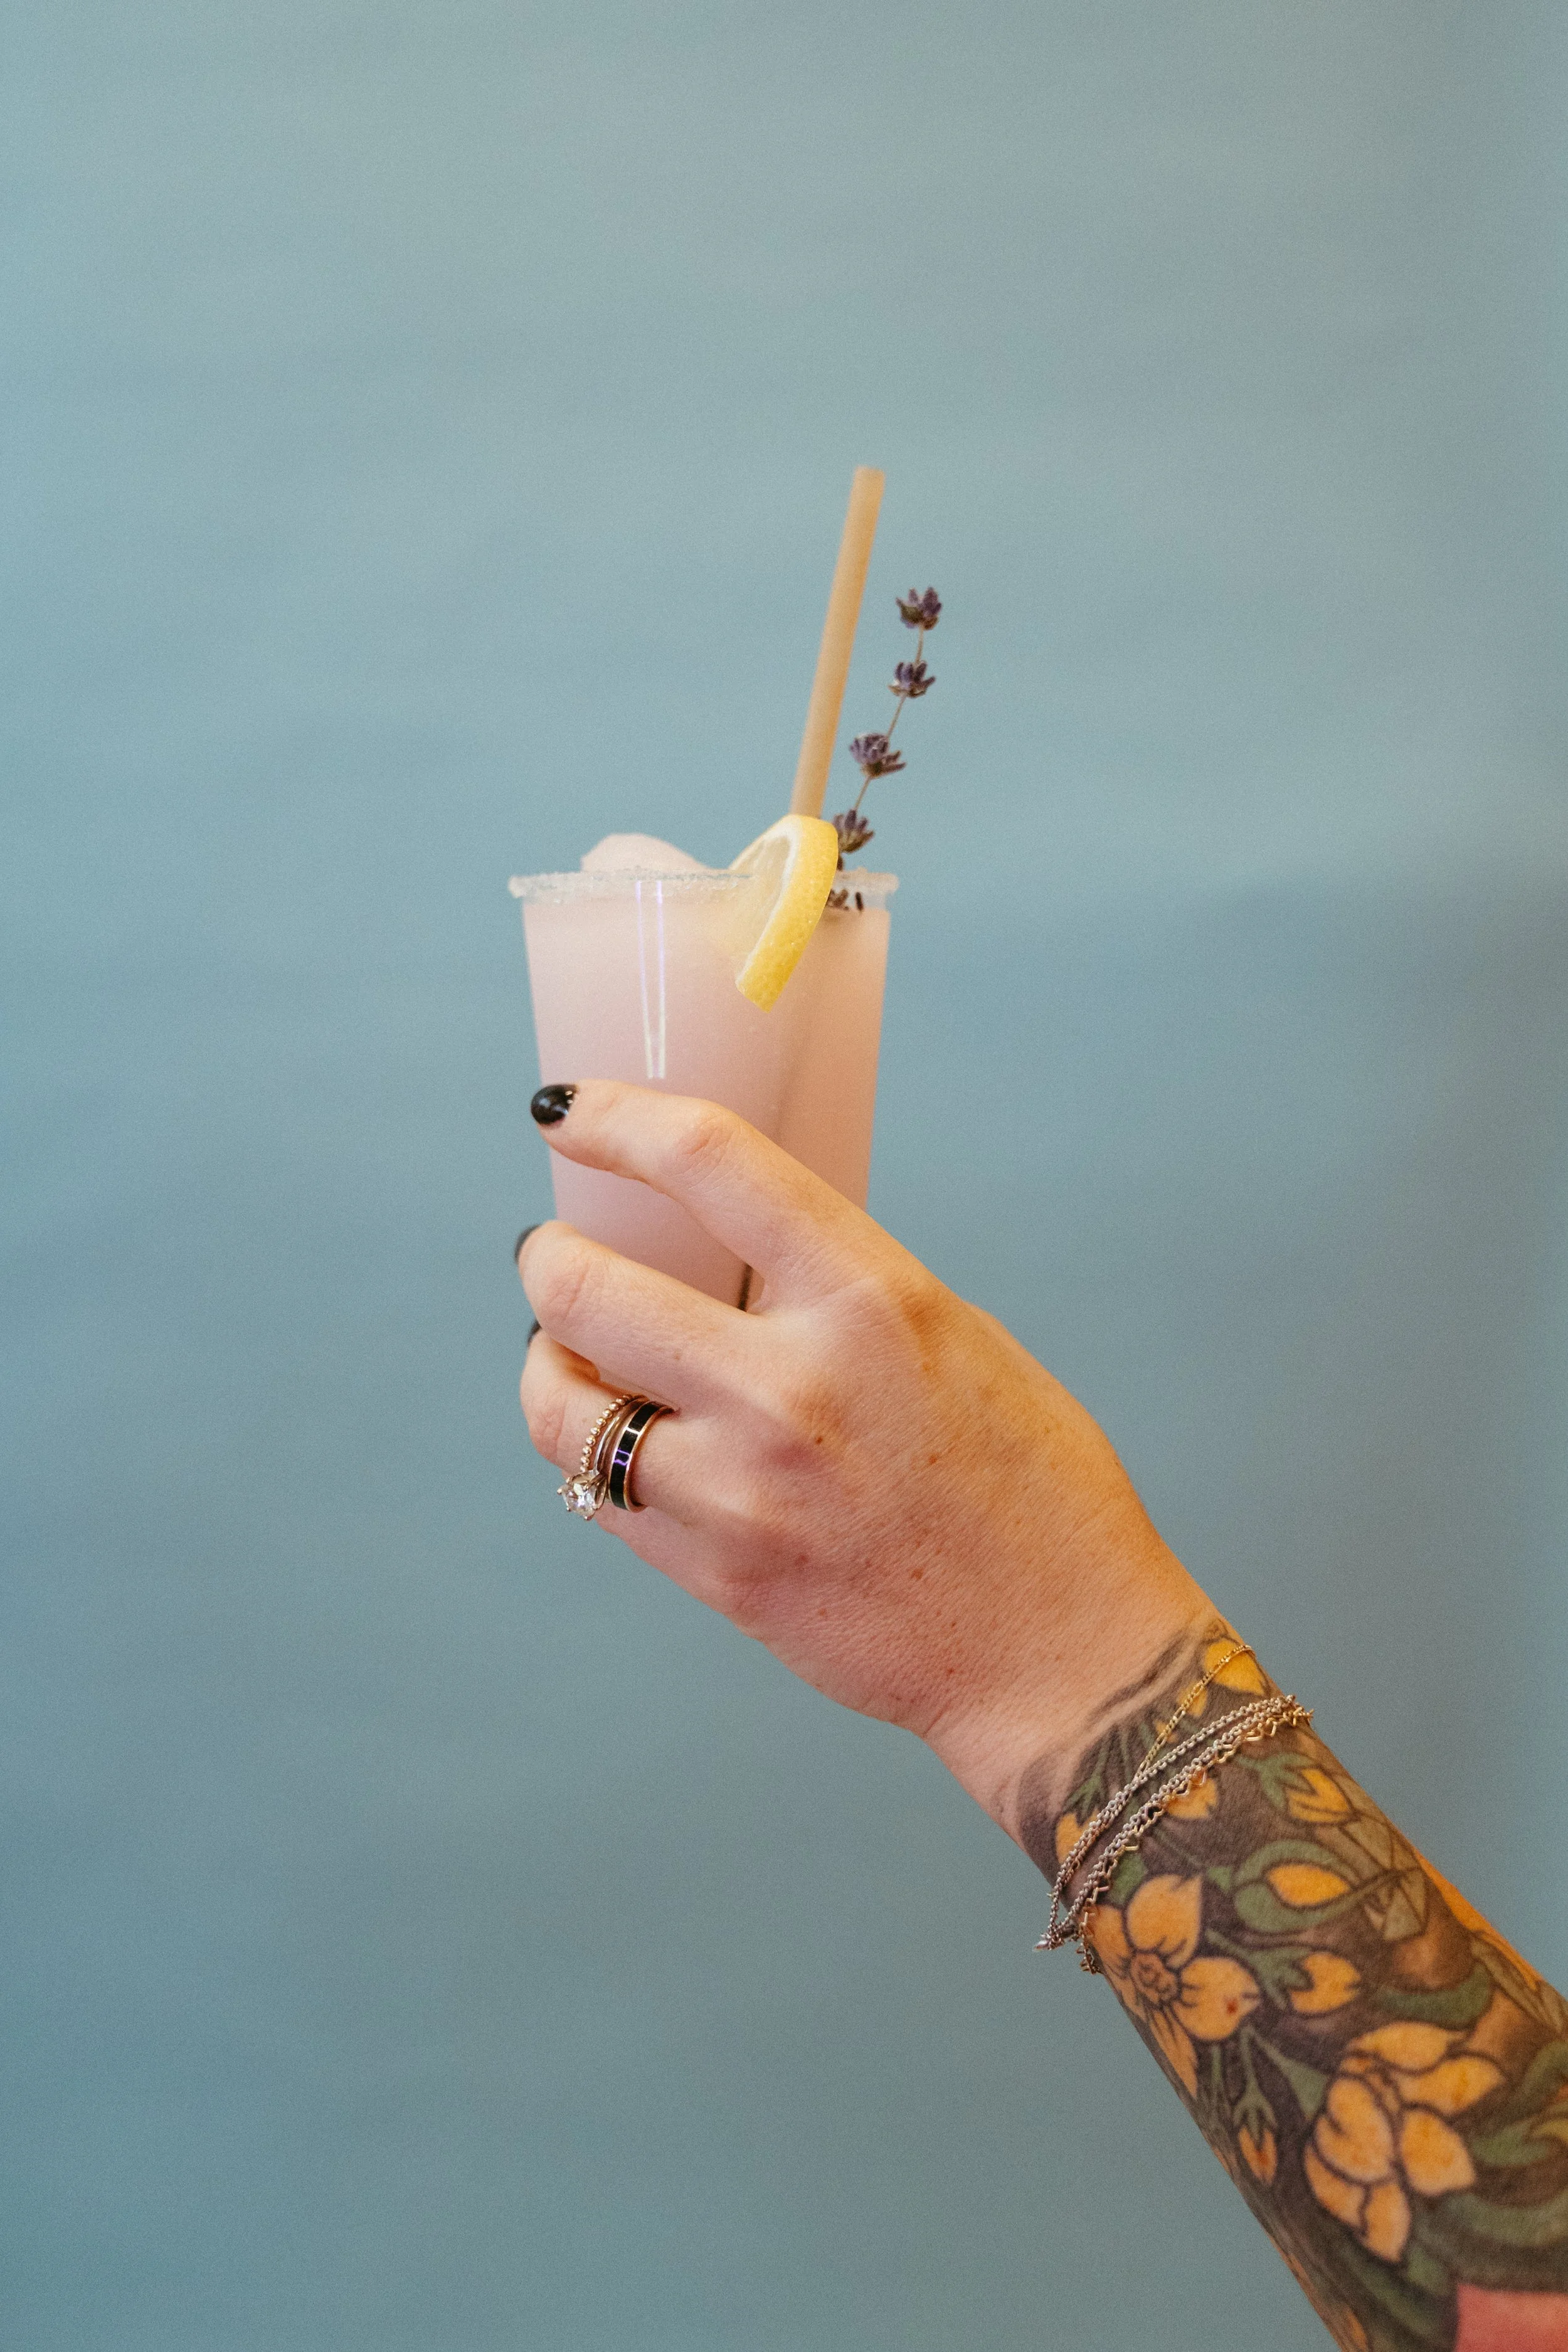
Bestie Bash
Our Cincy friends gathered for a delightful photo session that brought delicious mocktails, photo booth, custom charcuterie all in celebration of beautiful friendships.
Our Cincy friends gathered for a delightful photo session that brought delicious mocktails, photo booth, custom charcuterie all in celebration of beautiful friendships.
custom cookies: @claires.cakery
disco photo booth : @discopop.photobooth
event photography : @kindredlightstudios!
permanent jewelry: @foreverhoneygold
frozen mocktails : @SistersandSpirits
custom charcuterie: @cheese.garden


Sisters & Spirits by
Mollie and Maggie
Raise the bar with their mobile bartending experience!
instagram | website


Claire’s Cakery by Claire Purcell
Cincinnati based Pastry Chef ready to help you enjoy the sweeter things in life!
instagram | facebook | website


Cheese Garden by Lauren Barker
Arranging boards (almost) too pretty to eat.
instagram | website


Forever Honey by Chelsea & Dakota
Cincinnati based Pastry Chef ready to help you enjoy the sweeter things in life!
instagram | website


Disco Pop Photobooth by Amber and Maggie of
KINDRED LIGHT STUDIOS
Make it pop like Champagne! Fiesta like there is no mañana.
instagram | website


Good Boy “Oh, Rocket Dog” featuring
🚀 Rocket & Kati
Follow Oh,Rocket Dog for three goofy pups on adventures!
rocket’s instagram | kati’s instagram


